Create Your First Space
Overview
Your space is more than a container — it’s the operating system of your community.
It defines:
Who your community is for
What kind of interaction happens
How access evolves over time
How engagement scales
Before adding members, take 5 minutes to design the structure intentionally.
Step 1 — Clarify Your Space Strategy
Before clicking “Create”, answer these:
1. Who is this space for?
Be specific.
Not:
“Founders”
Better:
“Early-stage B2B SaaS founders in Europe”
Clarity increases alignment.
2. What is the core outcome?
What should members gain here?
Connections?
Deal flow?
Learning?
Hiring?
Collaboration?
A space without a defined outcome becomes a feed.
3. What action should members take weekly?
Healthy communities have recurring behaviors:
Attend events
Post updates
Ask questions
Share resources
Join discussions
Design for behavior, not content.
Step 2 — Create the Space
Once you’ve defined the purpose of your community, you can create the space.
Go to Spaces → Create a New Space and complete the setup steps.
During this process, you’ll define the identity, positioning, and visibility of your community.
The setup includes the following sections:
Space Details
Logo
Cover Image
About
Description
Markers
Each step helps members understand what your community is about and whether it’s relevant for them.

Space Details
This section defines the basic identity and positioning of your space.
Name
Choose a clear and intentional name.
Avoid generic titles like:
Community
Hub
Network
Better examples:
AI Leaders Network
Founders + Funders
Women in Tech
A strong name signals who the space is for.
Website
Add your organization’s website if the community is connected to a brand or company.
This helps members:
verify credibility
learn more about the organization
access external resources
Access Type
Access type determines who can join your space.
Common setups include:
Public
Anyone can discover and join this space.
Invite only
Members must be invited or approved. Non-members will only see the space profile.
Community Category
This helps classify your community and improves discovery.
Examples:
Mentor Community
Angel Community
Global Community
Event Community
Social Community
Choose the category that best reflects the primary purpose of your space.
Industry
If your community focuses on a specific sector, select the relevant industry.
Examples:
Technology
Venture Capital
Nonprofit
Education
Creative Arts
Industry tags help members quickly understand the context of discussions and opportunities shared inside the space.
Community Type
Community type defines how members primarily interact with each other.
This helps set expectations for how the community operates and what kind of experiences members will have.
You can choose between three formats:
Virtual
Members interact primarily online.
Typical activities include:
Online events and webinars
Discussions and posts
Resource sharing
Direct messaging and group chats
Virtual communities are ideal for global networks and distributed members.
Examples:
Founder communities
Professional networks
Industry groups
In Person
Members interact mainly through physical events and local gatherings.
The community platform supports coordination, but the primary experience happens offline.
Typical activities include:
Meetups
Workshops
Conferences
Local networking events
This format works well for local communities or regional organizations.
Examples:
City founder groups
Alumni chapters
Industry meetups
Hybrid
Members engage both online and offline.
The platform enables continuous interaction between in-person events.
Typical activities include:
Community discussions
Online and offline events
Member introductions
Resource sharing
Hybrid communities are often the most dynamic, combining real-world relationships with ongoing digital engagement.
Examples:
Professional networks with events
Membership organizations
Global communities with local chapters
💡 Tip
If your community hosts events but members also interact regularly online, Hybrid is usually the best choice.
It allows your community to scale beyond geography while still supporting in-person connections.
Headquarters
If your community is geographically centered, specify a headquarters location.
Examples:
New York
London
Berlin
Istanbul
Even global communities benefit from having a reference location, especially for organizing events and chapters.
Tagline (Optional)
A short one-line summary that captures the essence of your community.
Good taglines explain value, not just identity.
Example:
AI Leaders Network
Where AI operators and investors exchange insights and build partnerships.
Keep it short and clear.
Logo
Upload a logo that represents your community or organization.
Recommendations:
Square format
High contrast
Minimal text
The logo will appear across the platform including:
space navigation
member directory
events
announcements
Consistent branding helps your community feel more professional.
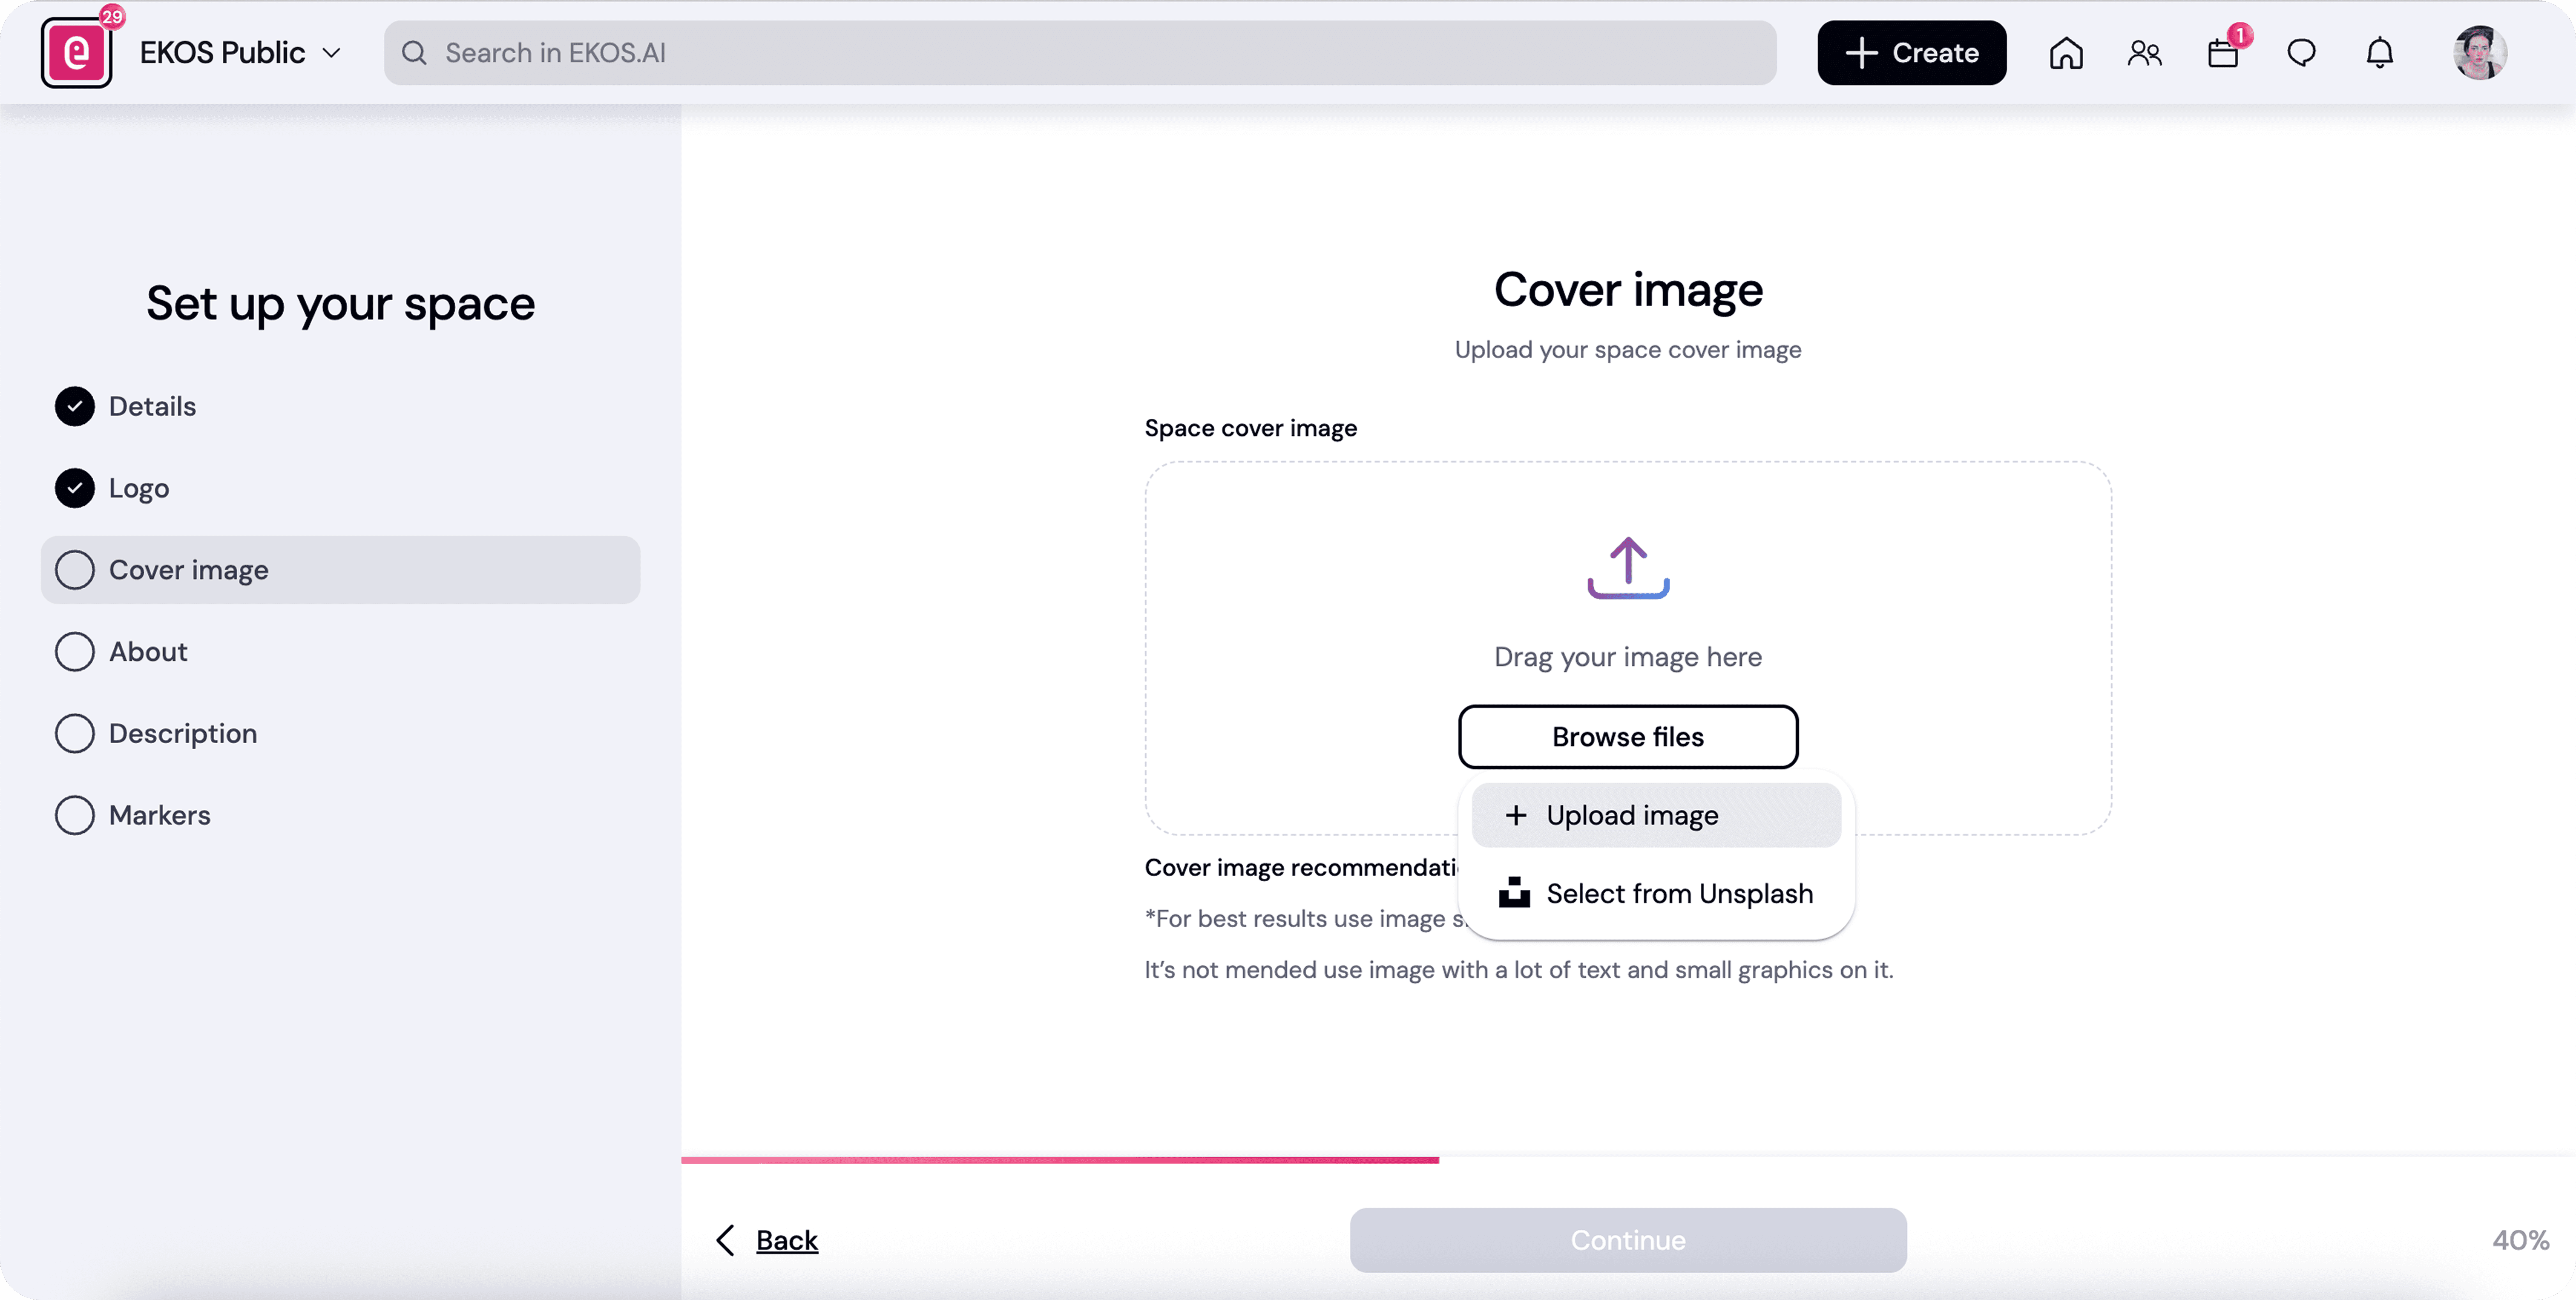
Cover Image
The cover image defines the visual identity of your space.
Choose an image that reflects:
the community theme
your brand style
the atmosphere of the community
Examples:
Founder network → modern / startup visuals
Alumni network → campus or heritage imagery
Creative community → artistic visuals
Avoid overly generic stock photos.
About
The About section provides a concise introduction to your community.
Keep this section short and informative.
Include:
who the community is for
what members gain
how people typically participate
Example:
A curated network of early-stage founders and investors sharing insights, partnerships, and opportunities.
This is often the first thing potential members read.
Description
The description expands on your community’s purpose and structure.
Use this section to explain:
the mission of the community
the types of conversations happening inside
the kinds of members you welcome
Example topics you might mention:
regular events
networking opportunities
shared resources
mentorship or collaboration
Think of this as the long-form introduction to your community.
Markers
Markers are tags that highlight the key themes or values of your community.
They help:
categorize conversations
match members with relevant people
guide engagement recommendations
Examples of markers:
AI
Venture Capital
Startup Growth
Sustainability
Product Leadership
Choose markers that reflect the most important topics discussed in your community.
Before Moving to the Next Step
Make sure the following are clear:
Your community name reflects its purpose
The access type matches your growth strategy
The description explains what members will gain
Your branding feels intentional
Once these elements are set, you can continue configuring the rest of your community structure.
Step 3 — Define Your Initial Structure
Now you’ll set up sections.
Resist adding everything at once.
Start minimal.
Recommended Starter Structure
1. Welcome / Introductions (Post Section)
Purpose: Social onboarding
2. Events (Event Section)
Purpose: Recurring engagement driver
3. Resources (Resource Section)
Purpose: Long-term value archive
4. Announcements (Optional)
Purpose: Controlled communication
Avoid These Early Mistakes
❌ Too many sections
❌ Vague section names (“General”, “Random”)
❌ Opening everything to everyone
❌ No clear pinned post
Step 4 — Configure Access & Roles
Before inviting members:
Define:
Who can post?
Who can create events?
Who can send announcements?
Start simple:
1–2 Admins
Members default
Limit announcement permissions
You can always expand later.
Step 5 — Create a Strong First Impression
Before inviting anyone:
Add:
A welcome post
A pinned introduction guide
At least 1 upcoming event (even if tentative)
1–2 resources
Empty spaces reduce perceived momentum.
Your goal: make it feel alive before the first invite.
Step 6 — Invite Intentionally
Start with 5–20 highly aligned members.
Early members define culture.
If your first 10 people don’t post, the next 100 won’t either.
Advanced: Designing for Scale
If you plan to grow:
Consider:
Membership tiers
Subspaces
Role-based visibility
AI engagement activation
You don’t need to activate all of this immediately — but structure with growth in mind.
Common Use Cases
Founder Network
Focus on events + curated discussions.
Corporate Community
Focus on announcements + controlled sections.
Alumni Network
Focus on directory + subspaces + regional events.
Paid Membership
Focus on tier access + exclusive resources.
Checklist Before Going Live
Space name is clear
Description defines purpose
Sections are intentional
Welcome post is published
Roles are configured
At least one event exists
If all boxes are checked → you’re ready to invite.
💡 Why This Matters
Communities fail because of unclear structure — not lack of interest.
A well-designed space:
Increases participation
Reduces admin workload
Improves retention
Scales without chaos
Structure is not restriction.
It’s clarity.